
Views: 0 Author: Site Editor Publish Time: 2026-08-23 Origin: Site


Contaminant-free components directly dictate the operational longevity, thermal efficiency, and precise tolerances of a rebuilt or maintained engine. Removing baked-on carbon, polymerized oil, and heavy sludge presents a significant technical challenge for any mechanic or machinist. You must eliminate these stubborn deposits without damaging sensitive metallurgy or violating strict environmental compliance standards. A microscopic layer of carbon left on a piston ring land can cause immediate compression loss, while trapped sludge in an oil gallery will destroy fresh bearings upon startup. This guide evaluates the efficacy, risks, and implementation realities of various chemical and mechanical methods used to clean car engine parts. We will explore everything from heated aqueous washers to ultrasonic cavitation. You will learn how to navigate material constraints, avoid flash rust, and select the optimal cleaning solution for your specific rebuild or maintenance requirements.
Material Compatibility is Critical: Selecting the wrong solvent or abrasive can etch aluminum cylinder heads, degrade polymeric seals, or induce flash rust on cast iron blocks.
Aqueous vs. Solvent Shift: Modern aqueous parts washers provide comparable degreasing power to traditional petroleum solvents while mitigating VOC exposure and hazardous waste disposal costs, making them the new standard for auto remanufacturing.
Mechanical Agitation Multiplies Chemical Efficacy: Relying solely on chemical soaks is inefficient; integrating ultrasonic cavitation or pressurized fluid streams drastically reduces cleaning time for complex car engine parts.
In-Situ vs. Teardown: Differentiate between superficial engine bay detailing (aesthetic/diagnostic) and component-level deep cleaning (functional rebuilds), as each requires entirely different equipment, temperature controls, and risk mitigation strategies.
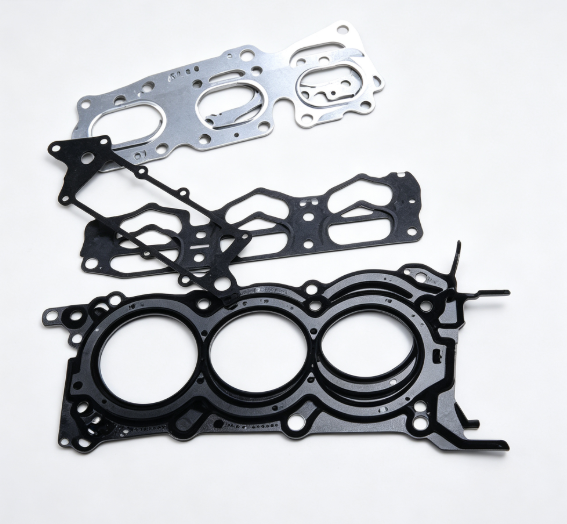
A truly clean engine component goes far beyond visual aesthetics. You need a specific surface finish to ensure proper gasket sealing, accurate bearing seating, and unrestricted fluid flow. Older engines utilized thick composite head gaskets that could conform to rough surfaces. Modern engines rely on multi-layer steel (MLS) head gaskets that require a highly refined surface finish, often measured at 50 Roughness Average (RA) or smoother. Microscopic debris left on a mating surface causes immediate head gasket failure. Sludge trapped in an oil gallery will quickly destroy fresh journal bearings upon startup. The ultimate goal is bare metal. You must remove every trace of hydrocarbon residue, carbon buildup, and old silicone sealant. Even a single piece of lint from a shop rag left inside a lifter bore can cause catastrophic valvetrain failure.

Aggressive mechanical cleaning easily alters critical engine clearances. Using rotary wire wheels or harsh abrasives on crankshaft journals, valve stems, and cylinder walls removes base metal along with the dirt. Main bearing clearances often measure as tight as 0.0015 to 0.0025 inches. Even a fraction of a thousandth of an inch of material loss ruins the hydrodynamic wedge of oil required for bearing survival. You must prioritize non-destructive methods when handling precision-machined car engine parts. Aggressive scraping with steel tools gouges mating surfaces, creating leak paths that gaskets cannot bridge.
Follow these steps to ensure tolerance preservation during the cleaning process:
Measure initial clearances using a micrometer and dial bore gauge before applying any chemicals.
Select non-abrasive chemical solvents for the first pass to dissolve soft sludge.
Use plastic scrapers or soft brass brushes instead of steel putty knives on aluminum surfaces.
Mask off all machined bearing journals with heavy-duty tape before abrasive blasting.
Re-measure all journals and bores after the final wash to verify no material was lost.
Different engine materials demand specific chemical approaches to prevent permanent damage. A one-size-fits-all approach will ruin expensive castings.
Aluminum & Alloys: These metals are highly sensitive to high-alkaline cleaners. Using a chemical with a pH level above 9 or 10 risks severe etching, dark discoloration, and surface pitting. Aluminum requires specialized, pH-neutral detergents.
Cast Iron & Steel: Ferrous metals face extreme vulnerability to rapid oxidation. Flash rust forms within minutes after a hot wash removes the protective oil layer. You must have a rust inhibitor ready before the block even comes out of the wash tank.
Elastomers & Plastics: Rubber valve stem seals, Viton O-rings, and plastic timing chain guides suffer rapid degradation when exposed to chlorinated solvents or aggressive petroleum distillates. These components usually require replacement, but if they must be reused, clean them only with mild dish soap and warm water.Evaluating Cleaning Methods and Equipment (Solution Categories)
Aqueous washers utilize high heat, specialized alkaline detergents, and pressurized spray manifolds to break down grime. They operate similarly to an industrial dishwasher. The heat, usually set between 160 and 180 degrees Fahrenheit, accelerates the saponification process where alkaline chemicals turn grease into soap. These systems are environmentally compliant and produce exceptionally low volatile organic compounds (VOCs). This method is safe for most car engine parts and highly scalable for busy shop environments. Aqueous cleaning represents the ideal upgrade path for operations transitioning away from toxic solvents. However, these systems require a high initial equipment investment. They also consume significant electrical energy to maintain bath temperatures. You must consistently monitor and replenish rust-inhibitor additives to protect iron blocks and heads, and regularly skim the floating oil off the top of the reservoir to maintain cleaning efficacy.

Traditional solvent tanks rely on petroleum distillates like aliphatic hydrocarbons or mineral spirits. These chemicals excel at dissolving heavy, hydrocarbon-based sludge. They offer excellent performance against thick grease and evaporate quickly from the metal surface. Solvent cleaning poses absolutely no flash rust risk on ferrous metals because it leaves a light oily film behind. Conversely, solvents present serious flammability hazards and emit toxic fumes that require dedicated ventilation and fire safety cabinets. Stringent disposal regulations and diminishing industry support make this method less viable for modern engine remanufacturing. Mechanics must wear heavy nitrile gloves, as these solvents will absorb directly through the skin and strip natural oils from the hands.
Ultrasonic tanks use piezoelectric transducers to generate high-frequency sound waves, typically around 40kHz. These waves create microscopic cavitation bubbles in a heated detergent bath. When these bubbles implode against the metal, they blast contaminants off the surface with immense localized force. This method excels at cleaning intricate car engine parts featuring blind holes and complex internal galleries. Fuel injectors, carburetors, and intricate variable valve timing components benefit greatly from this technology. You can verify the tank's operation by submerging a piece of aluminum foil; a properly working ultrasonic cleaner will perforate the foil within seconds. While the upfront equipment cost is high, ultrasonic cleaning remains unmatched for non-destructive, microscopic contaminant removal.
Abrasive blasting propels media via compressed air to mechanically fracture and remove hard carbon and scale. Dry ice blasting leaves no secondary waste because the solid CO2 media sublimates into gas upon impact, making it perfect for cleaning assembled engines. Vapor honing uses a slurry of water and fine glass beads propelled at around 60 to 90 PSI. The water cushions the abrasive impact, gently cleaning and sealing aluminum surfaces to leave a factory-like finish. Soda blasting utilizes water-soluble sodium bicarbonate. While highly effective at stripping carbon, soda requires meticulous post-rinse procedures. If left behind, soda grit causes catastrophic engine bearing failure.
Comparison of Engine Part Cleaning Methods
| Cleaning Method | Primary Mechanism | Best Automotive Use Case | Primary Risk or Drawback |
|---|---|---|---|
| Aqueous Wash | Heat, detergent, pressurized spray | General engine block and cylinder head cleaning | Flash rust on bare iron components |
| Solvent Tank | Petroleum distillates dissolving oil | Heavy grease removal on exterior components | Flammability, VOC emissions, disposal |
| Ultrasonic | High-frequency cavitation bubbles | Intricate oil galleries, fuel injectors, carbs | High initial equipment cost, tank size limits |
| Vapor Honing | Wet abrasive glass bead slurry | Aluminum surface restoration and carbon removal | Media entrapment in blind threaded holes |
| Dry Ice Blasting | Sublimating CO2 pellets | In-chassis cleaning, delicate electrical areas | Extremely high equipment and media costs |
Proper preparation prevents cross-contamination and protects delicate surfaces from abrasive damage during the wash cycle.
Drain all residual oil and coolant from the block and heads to prevent contaminating your wash tank.
Remove all threaded and pressed-in oil gallery plugs. You cannot clean an oil gallery if the ends are sealed.
Utilize shop vacuums or compressed air to evacuate loose debris, sand, and grit before any chemical exposure.
Employ manual scraping with plastic razor blades to remove heavy sludge and stubborn gasket remnants.
Segregate all components by material type. Mixing dissimilar metals in a single heated wash tank can cause destructive galvanic reactions.
Select the appropriate chemical dwell time based strictly on the manufacturer’s specifications. This ensures full penetration of polymerized oils without damaging the base metal. Leaving an aluminum intake manifold in a high-alkaline bath for too long will turn it black and pit the surface. Utilize stiff nylon or brass brushes to agitate stubborn carbon deposits on piston crowns and combustion chambers. Never use steel wire brushes on aluminum car engine parts, as the steel will quickly gouge the softer metal. Use dedicated rifle brushes attached to a cordless drill to scrub the internal walls of the main oil galleries. Push the brush all the way through the gallery to push the sludge out the other side, rather than just moving it back and forth.
Neutralize all chemical agents with thorough water or clean solvent rinses. If you used an alkaline cleaner, a thorough freshwater rinse is mandatory to stop the chemical reaction. Utilize high-volume compressed air (at least 90 PSI) to forcefully evacuate moisture from blind threaded holes and internal fluid passages. Do not rely on shop rags for drying, as they leave lint behind that can clog oil pickup screens. Apply lightweight machine oil or dedicated rust inhibitors immediately to bare ferrous car engine parts. This step is non-negotiable to prevent rapid oxidation on freshly cleaned cast iron blocks and crankshafts. Coat the cylinder walls heavily and rotate the block on the stand to ensure even coverage.
Cleaning an assembled engine bay focuses primarily on identifying fluid leaks and improving overall aesthetics. You are washing the exterior surfaces of an intact, sealed system. Conversely, cleaning individual car engine parts for a complete rebuild demands absolute contaminant removal down to the bare metal. These two scopes require entirely different equipment, chemicals, and risk management strategies. In-chassis cleaning requires careful protection of electrical systems and vacuum lines, while teardown cleaning focuses on preserving tight machining tolerances and internal fluid passages.
Check for and carefully document existing oil or coolant leaks before degreasing. Washing the engine erases the evidence needed for accurate diagnostics. If you are hunting for a specific leak, consider adding UV dye to the oil before washing. Ensure the engine is turned off and strictly cool to the touch. Applying cold water or harsh chemicals to a hot engine causes rapid chemical evaporation, noxious fumes, and severe thermal shock to cast metal exhaust manifolds, which can cause them to crack instantly. Use a leaf blower, shop vacuum, or compressed air to perform a dry pre-cleaning. Remove loose dirt, leaves, and pine needles from the cowl, windshield wiper valley, and intake manifold crevices prior to introducing any liquids.
Evaluate foaming degreasers and citrus-based cleaners for in-chassis work. These specific formulas are generally safe for exposed wiring harnesses, rubber coolant hoses, and painted fender surfaces. Spray the degreaser evenly across the dirty areas, starting from the bottom and working your way up to prevent streak marks. Allow a strict three to five-minute dwell time for optimal penetration. Agitate heavy grease spots with a soft-bristled detailing brush. Do not let the solution dry on the components, as this leaves a stubborn, chalky residue that is difficult to remove and can stain aluminum permanently.
Water ingress ruins modern automotive electrical systems. You must isolate the alternator, fuse boxes, exposed air intake filters, and ignition coil packs before in-chassis pressure washing. Wrap these sensitive components tightly with plastic bags and secure them with painter's tape. Apply dielectric grease to exposed electrical connectors for an extra layer of moisture protection. Avoid pointing high-pressure water wands directly at electrical connectors, alternator bearings, or power steering pump seals. Keep the spray nozzle at least three feet away from the engine surface to prevent forcing water past weather-tight seals.
Properly handle all toxic runoff and manage spent solvents. Adhere strictly to local and federal disposal regulations. Never dump used degreasers, heavy metals, or oil-contaminated wash water down municipal drains. Establish a clear framework for capturing and recycling cleaning fluids to maintain a safe and compliant workspace. Use oil-water separators in your shop drains to catch hydrocarbons before they enter the sewer system. Wear appropriate personal protective equipment, including heavy-duty nitrile gloves, a respirator, and splash goggles, when handling aggressive alkaline detergents or petroleum solvents.
Heated aqueous cleaning strips all protective oils from the metal surface. The combination of bare iron, high heat, and moisture accelerates oxidation exponentially. Flash rust can cover a freshly washed cast iron engine block in a matter of minutes as the hot water evaporates and exposes the raw iron to oxygen. Mitigate this chemical reaction by blow-drying the part immediately with compressed air. Follow up instantly by applying a water-displacing rust inhibitor spray or wiping the cylinder bores down with automatic transmission fluid. ATF is highly detergent and leaves an excellent protective film on cast iron.
Abrasive blasting carries the inherent danger of trapped media. Glass beads, aluminum oxide, or soda particles easily lodge inside hidden oil galleries and blind threaded holes. If this abrasive media dislodges during engine operation, it acts as a grinding paste, destroying the bearings and oil pump instantly. Implement mandatory quality assurance checks. Run stiff nylon brushes through all fluid passages. Flush the galleries repeatedly with high-pressure solvent and compressed air before beginning the engine reassembly process. Shine a high-lumen flashlight down every threaded hole to verify no glass beads remain trapped at the bottom.
The optimal method for cleaning car engine parts depends entirely on the scale of the project and the specific metallurgy of the components. Professional rebuilders prioritizing compliance and precision should invest heavily in heated aqueous and ultrasonic systems. Targeted solvent and manual brushing methods remain highly practical for low-volume or DIY applications. Selecting the right process preserves critical machining tolerances and ensures a successful engine build.
Take the following steps to improve your parts cleaning workflow:
Audit your current cleaning setup to identify and eliminate fire safety hazards and improper chemical disposal methods.
Test the pH levels of your chosen degreasers on scrap aluminum to verify material compatibility before washing expensive cylinder heads.
Establish a strict post-cleaning lubrication protocol, keeping rust inhibitors stationed directly next to the wash tank.
Implement a mandatory gallery-flushing procedure using rifle brushes and compressed air after utilizing any abrasive media blasting.
A: The most effective chemical depends on the material. For heavy grease on cast iron, petroleum-based solvents or heavy-duty alkaline degreasers work best. For aluminum, use a pH-neutral or mildly alkaline aqueous detergent to prevent surface etching and discoloration.
A: The engine must be strictly cool to the touch. Applying chemicals to a hot engine causes rapid evaporation, leaving residue behind. It also creates noxious fumes and risks thermal shock, which can crack cast iron exhaust manifolds.
A: Yes, non-chlorinated brake cleaner is excellent for final prep on internal parts. It dissolves light oil and evaporates completely without leaving a residue. However, it is expensive for heavy degreasing and offers no rust protection for bare iron.
A: Soak the pistons in a dedicated carbon-dissolving solvent or an ultrasonic cleaner. Agitate the softened carbon with a nylon or soft brass brush. Never use steel wire wheels or hard scrapers, as they will gouge the soft aluminum.
A: Aqueous washers are safer, environmentally compliant, and eliminate toxic fumes and fire hazards. While they require heating and rust inhibitors, they match the cleaning power of solvents, making them the modern standard for professional shops.
A: Dry the block immediately using high-volume compressed air to remove all moisture from the surfaces and blind holes. Instantly apply a water-displacing rust inhibitor spray, WD-40, or a light coating of machine oil to seal the bare iron.
A: It is safe only if you take precautions. You must cover the alternator, fuse box, air intake, and coil packs with plastic bags. Keep the pressure wand at a distance and avoid spraying directly into electrical connectors or bearing seals.

